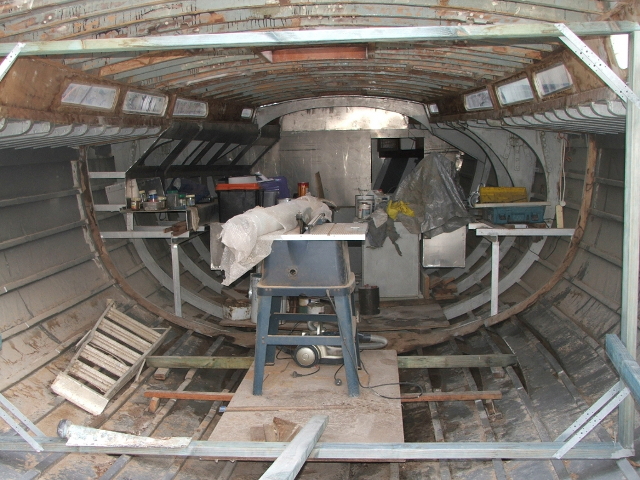
Well the new year came around and so did new determination. Here we are getting serious about the rebuilding. Its a mess, but the inside is nearly cleaned and repaired up now.
Notice all the filled holes in the deck beams. The original way of wiring was to drill through the deck beams for every wire. Need to run another wire ? no problem, drill another series of holes.
I suppose it kept the wires out of sight. but I wonder a bit about deck beams that look more like swiss cheese than structural members.
On the deck
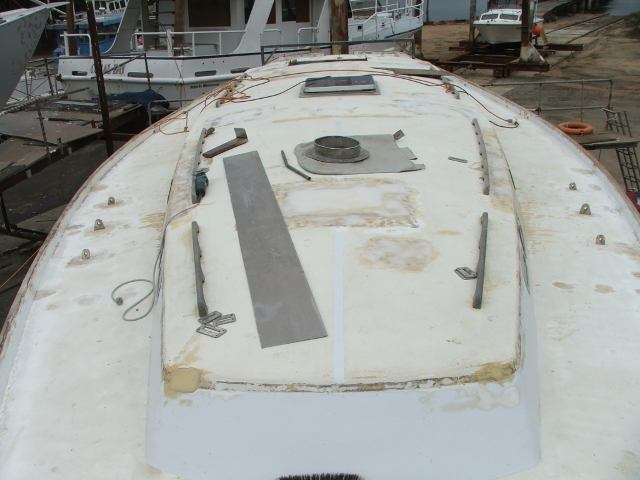
The initial repairs on the deck are nearly finished also. Every fitting except chain plates has been removed. Under some we found areas of dry rot where water had penetrated through screw holes into the plywood.
I could not believe how far rot would extend in the ply. A small bolt hole with dark discolouration would turn into an area 150mm square of degraded ply by the time the rot was cut out.
All the cut out areas and every bolt and screw hole was filled with epoxy and sealed up with glass fibre matting saturated with epoxy resin.
We also removed and filled all the coach house vents and most of the deck hatches. Only the 2 big ones were left.
Here the cabin top is nearly ready for a coat of 2 pack primer.
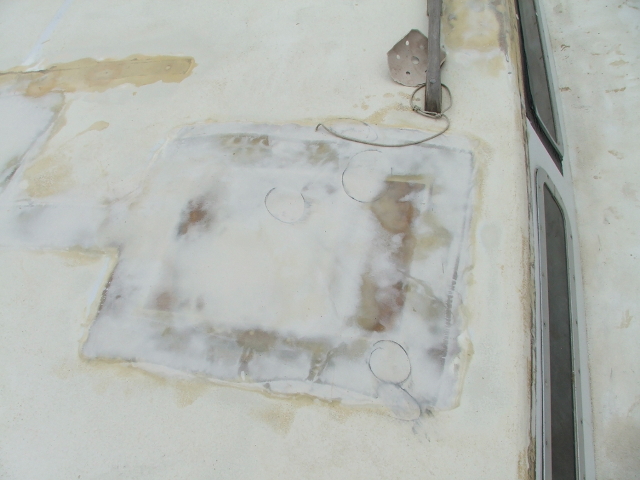
Here is a closeup of the repairs where a medium sized deck hatch was removed. A section of ply was bedded into the hole with epoxy. The repair was covered with a light fibre glass cloth saturated with epoxy resin. A mixture of glass resin and q-cell was then used to fair up the repair.
Epoxy is very strong but also very hard and it takes about 24 hours to cure. Its really difficult to get a smooth finish just with epoxy.
The glass resin and q-cell mix is much softer and easier to sand to get a fair surface. It also goes off a lot quicker, so you can apply it and sand it back after about 1 hour.
Bow and gunnels
We even took the stem fitting off. That has been modified slightly to give extra places to fit additional headsails etc. More on that later…
The gunnels used to be a strip of unpainted teak that capped the top of the hull planks and overlapped by about 10mm on the inside and outside.
That was a pain because it made painting harder – you had to mask the gunnels, and it made cleaning up between the deck and gunnel on the inside almost impossible.
So, the solution was to trim the gunnel back to the line of the hull planking, and paint it.
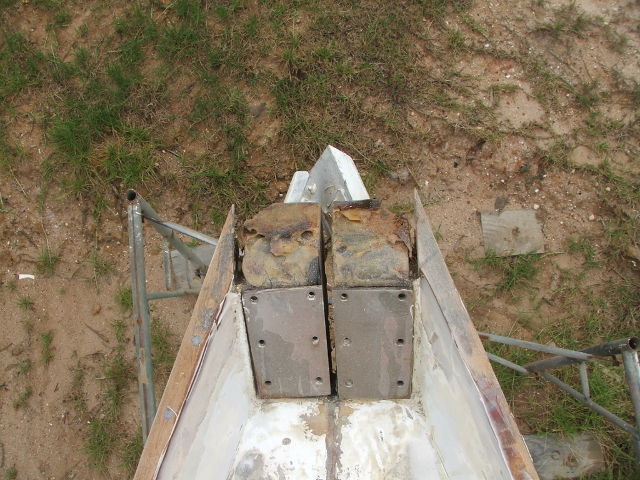
Here is a photo of where the stem fitting goes, and the forward section of gunnel in the process of being faired and sealed with epoxy after trimming to fit.
The brown gunk on the top of the stem timbers is I think resourcinol which was originally used to bed the stem fitting.


